Setting up WinCVS for the WCS project
This page shows you all the settings that must be made in WinCVS. (At least, this is how its all setup on my system).
- Get sfsetup and WinCVS
First get the software needed to install and configure WinCVS:
|
WinCVS
|
The CVS tool for Windows. Note that at this site other CVS
versions for other platforms are also available.
|
|
sfsetup
|
a helper tool to setup WinCVS for SourceForge.
|
- Install WinCVS
- Use the sfsetup tool
Read the sfsetup documentation to figure out the settings that you need.
- Configure SSH
In a dosbox, go to the directory where WinCVS was installed. Type:
ssh -l [username] cvs.sourceforge.net
This will create the needed home directory.
Make sure that you read the document about setting up and testing the
SSH and SCP connection.
http://sourceforge.net/docman/display_doc.php?docid=766&group_id=1
WinCVS is using ssh and scp for its own work. Therefore it is wise to make
sure that these low level services work correctly.
- Start WinCVS.
- Select [Admin]-[Preferences].
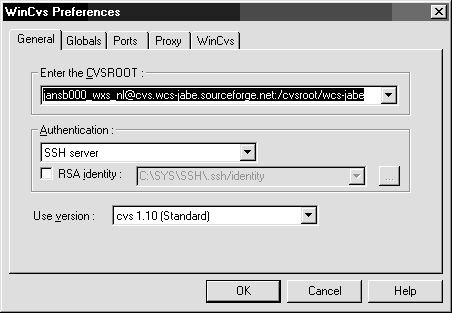
- Make settings on the tab "General".
Make sure that where it says "jansb000_wxs_nl" you fill in your own
SourceForge account-name.
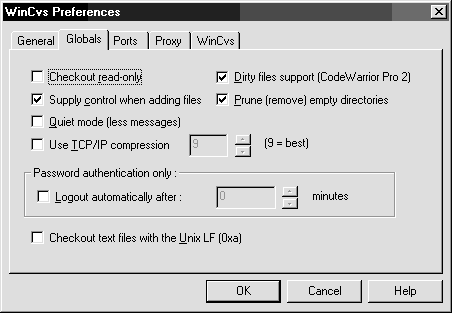
- Make settings on the tab "Globals".
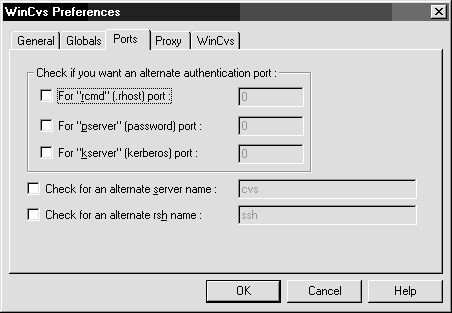
- Make settings on the tab "Ports".
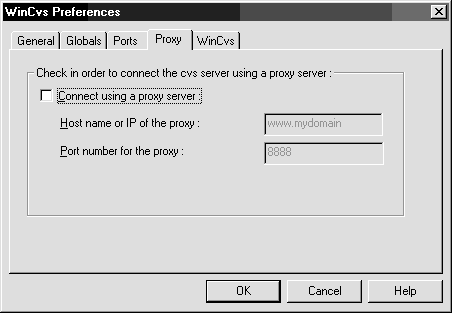
- Make settings on the tab "Proxy".
- Make settings on the tab "WinCVS".
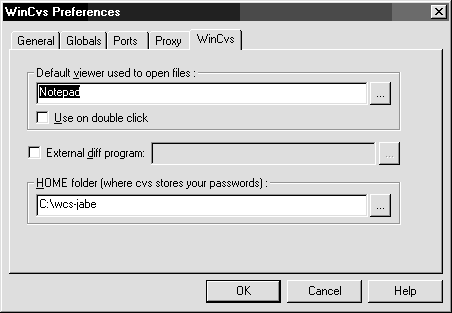
With these settings in place you should be able to contact the CVS-server from SourceForge.
To get the source-code: Start WinCVS, select "create->checkout module". For the projectname use "wcs-jabe" and click the ok-button. Enter your password in the separate command-line window that will pop-up.
If you have the source-code on your local machine you may copy this directory to create a working directory to perform your work. Personally I find it comfortable to keep my CVS directoy as clean as possible.


